Free & open source

Know every dollar
in your cloud, for free.
CostGoblin syncs your AWS billing data locally and queries it with DuckDB. No servers. No SaaS fees. Your data never leaves your machine.
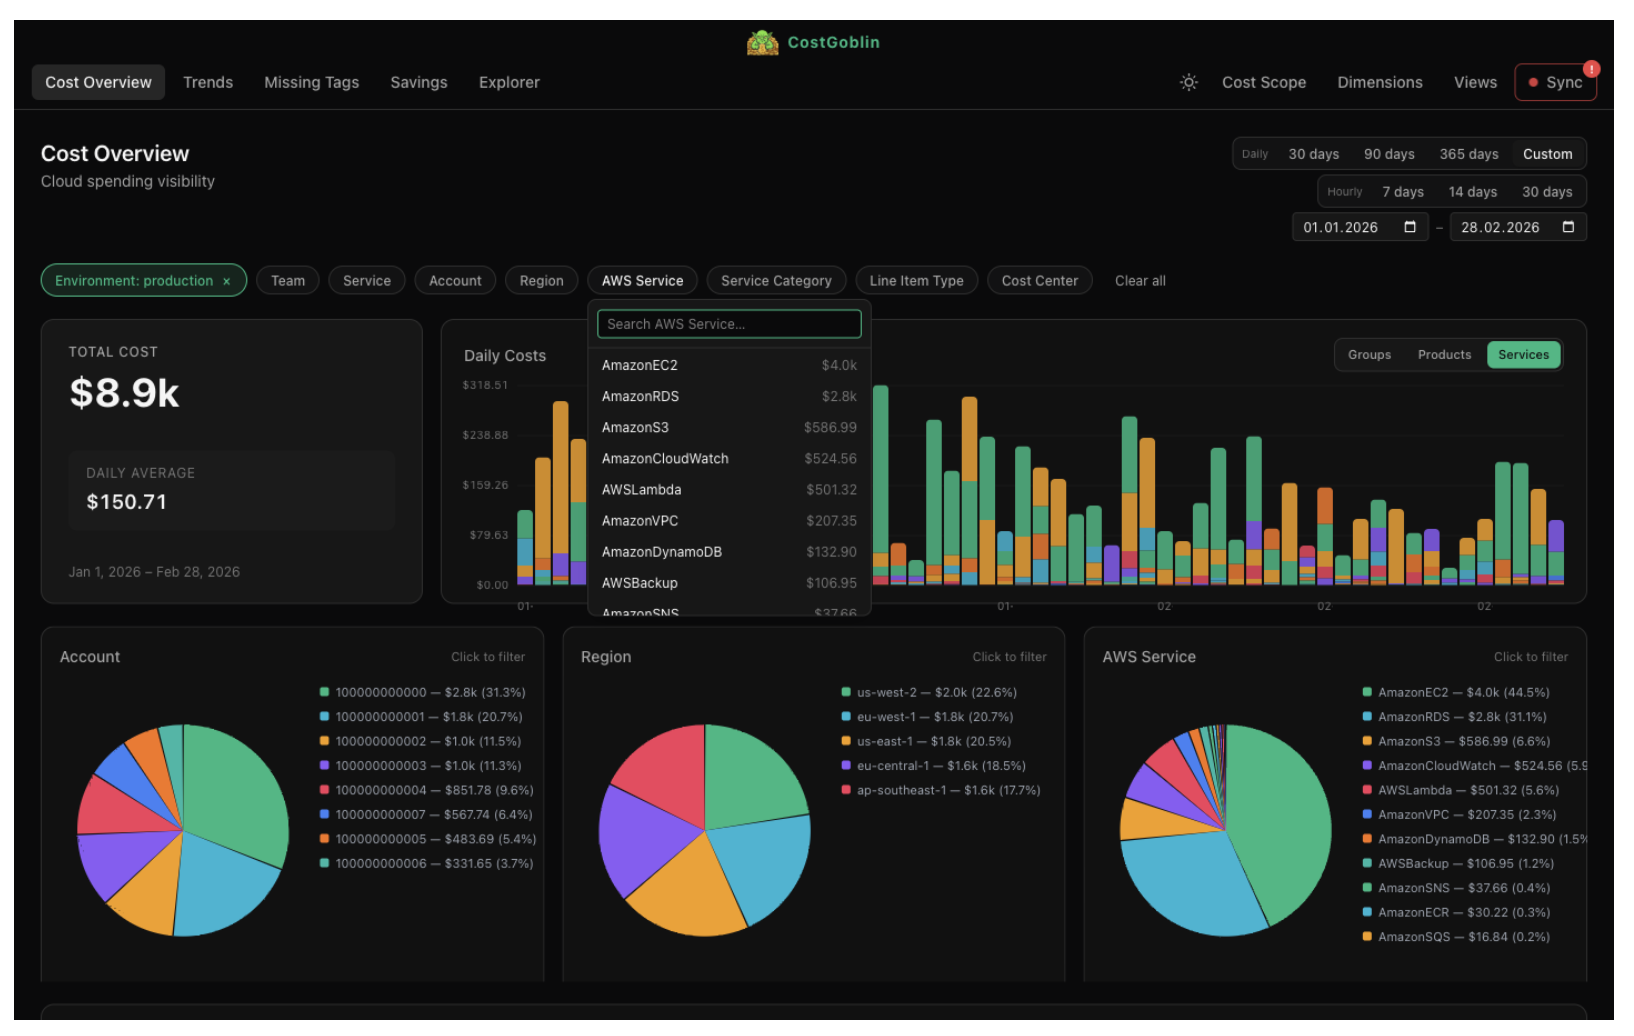
CostGoblin syncs your AWS billing data locally and queries it with DuckDB. No servers. No SaaS fees. Your data never leaves your machine.
Cloud cost visibility shouldn't be a finance-only perk. CostGoblin is a desktop app for anyone curious about their AWS bill — and especially the engineers, architects, and small teams who can act on what they see.
Delete the orphaned RDS instance. Right-size the cluster. Kill the forgotten NAT gateway.
No sales call. No cross-account IAM role. No annual contract.
Seven views, one local DuckDB. From raw line items to AI-driven Q&A — every dollar accounted for, every query in milliseconds.
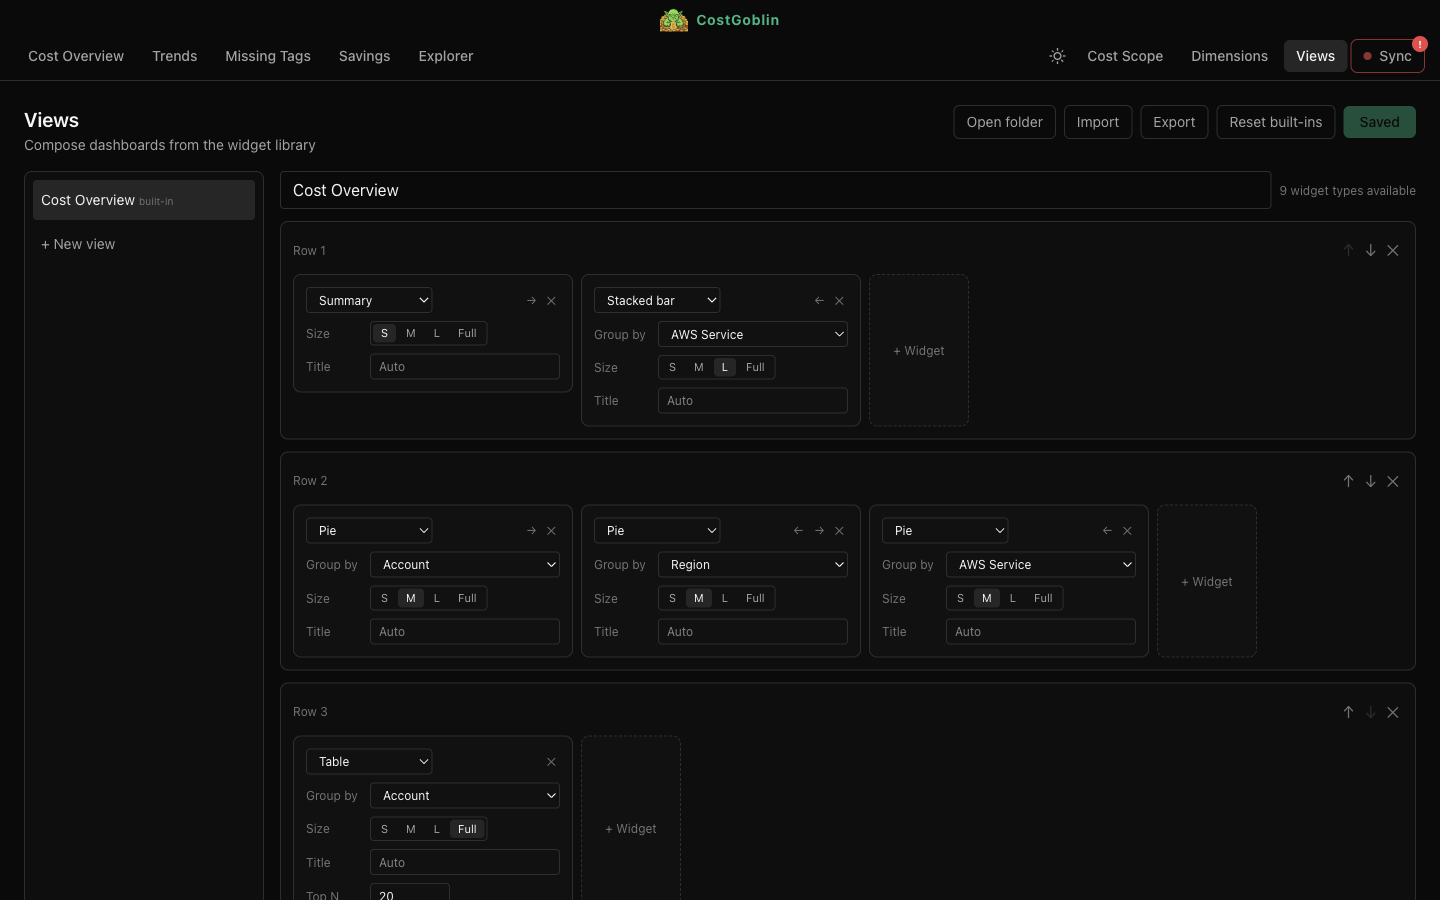
Cost trends, top services, biggest movers, and your most expensive dimensions — all on the landing screen. Filter by team, environment, region, or any custom tag and the whole view recomputes in milliseconds.
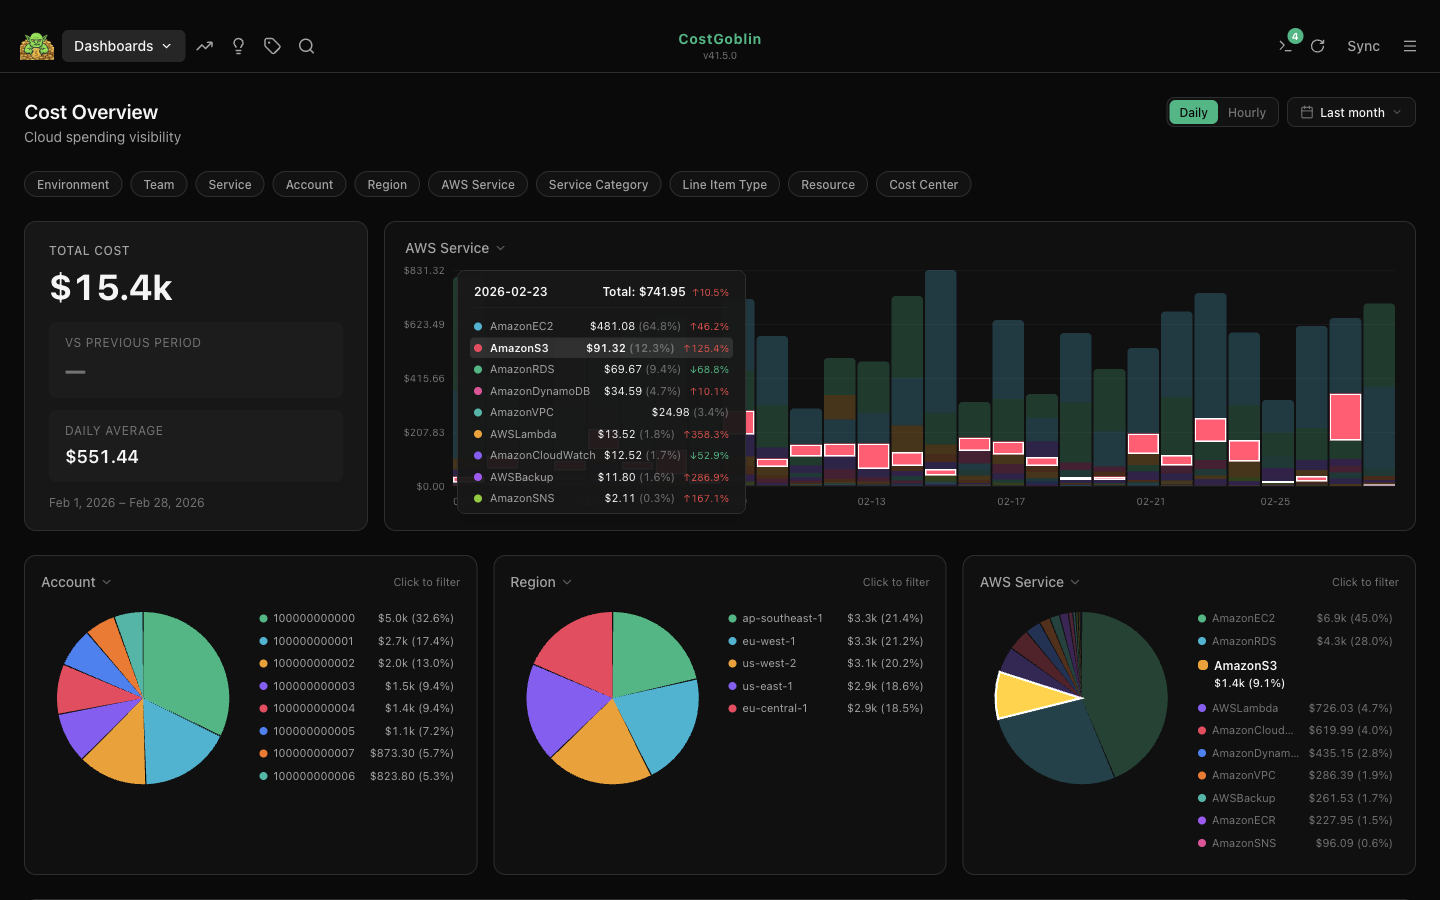
Most cost tools force you to fix tagging upstream and wait for the next data export. CostGoblin does it at query time. Rename, alias, group, fall back — any tag, any rule. prod, Prod, production become one. Custom dimensions from any tag key. Every change applies instantly, across every view, with zero re-processing.
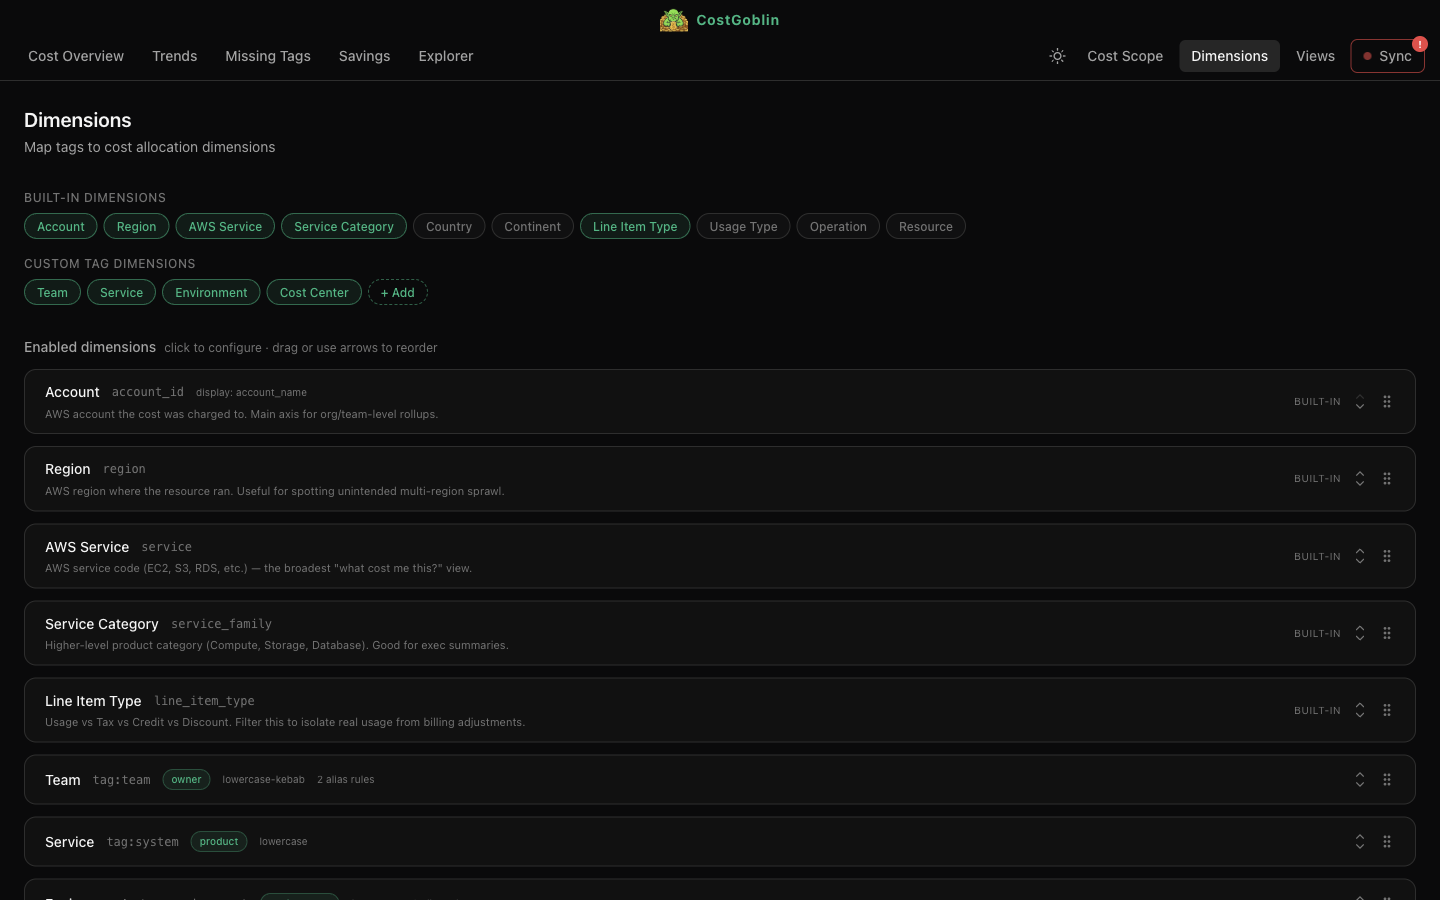
Compose custom views from a library of widgets — summary cards, stacked bars, pie charts, tables. Drag to reorder, resize, and group. Export and share as YAML.
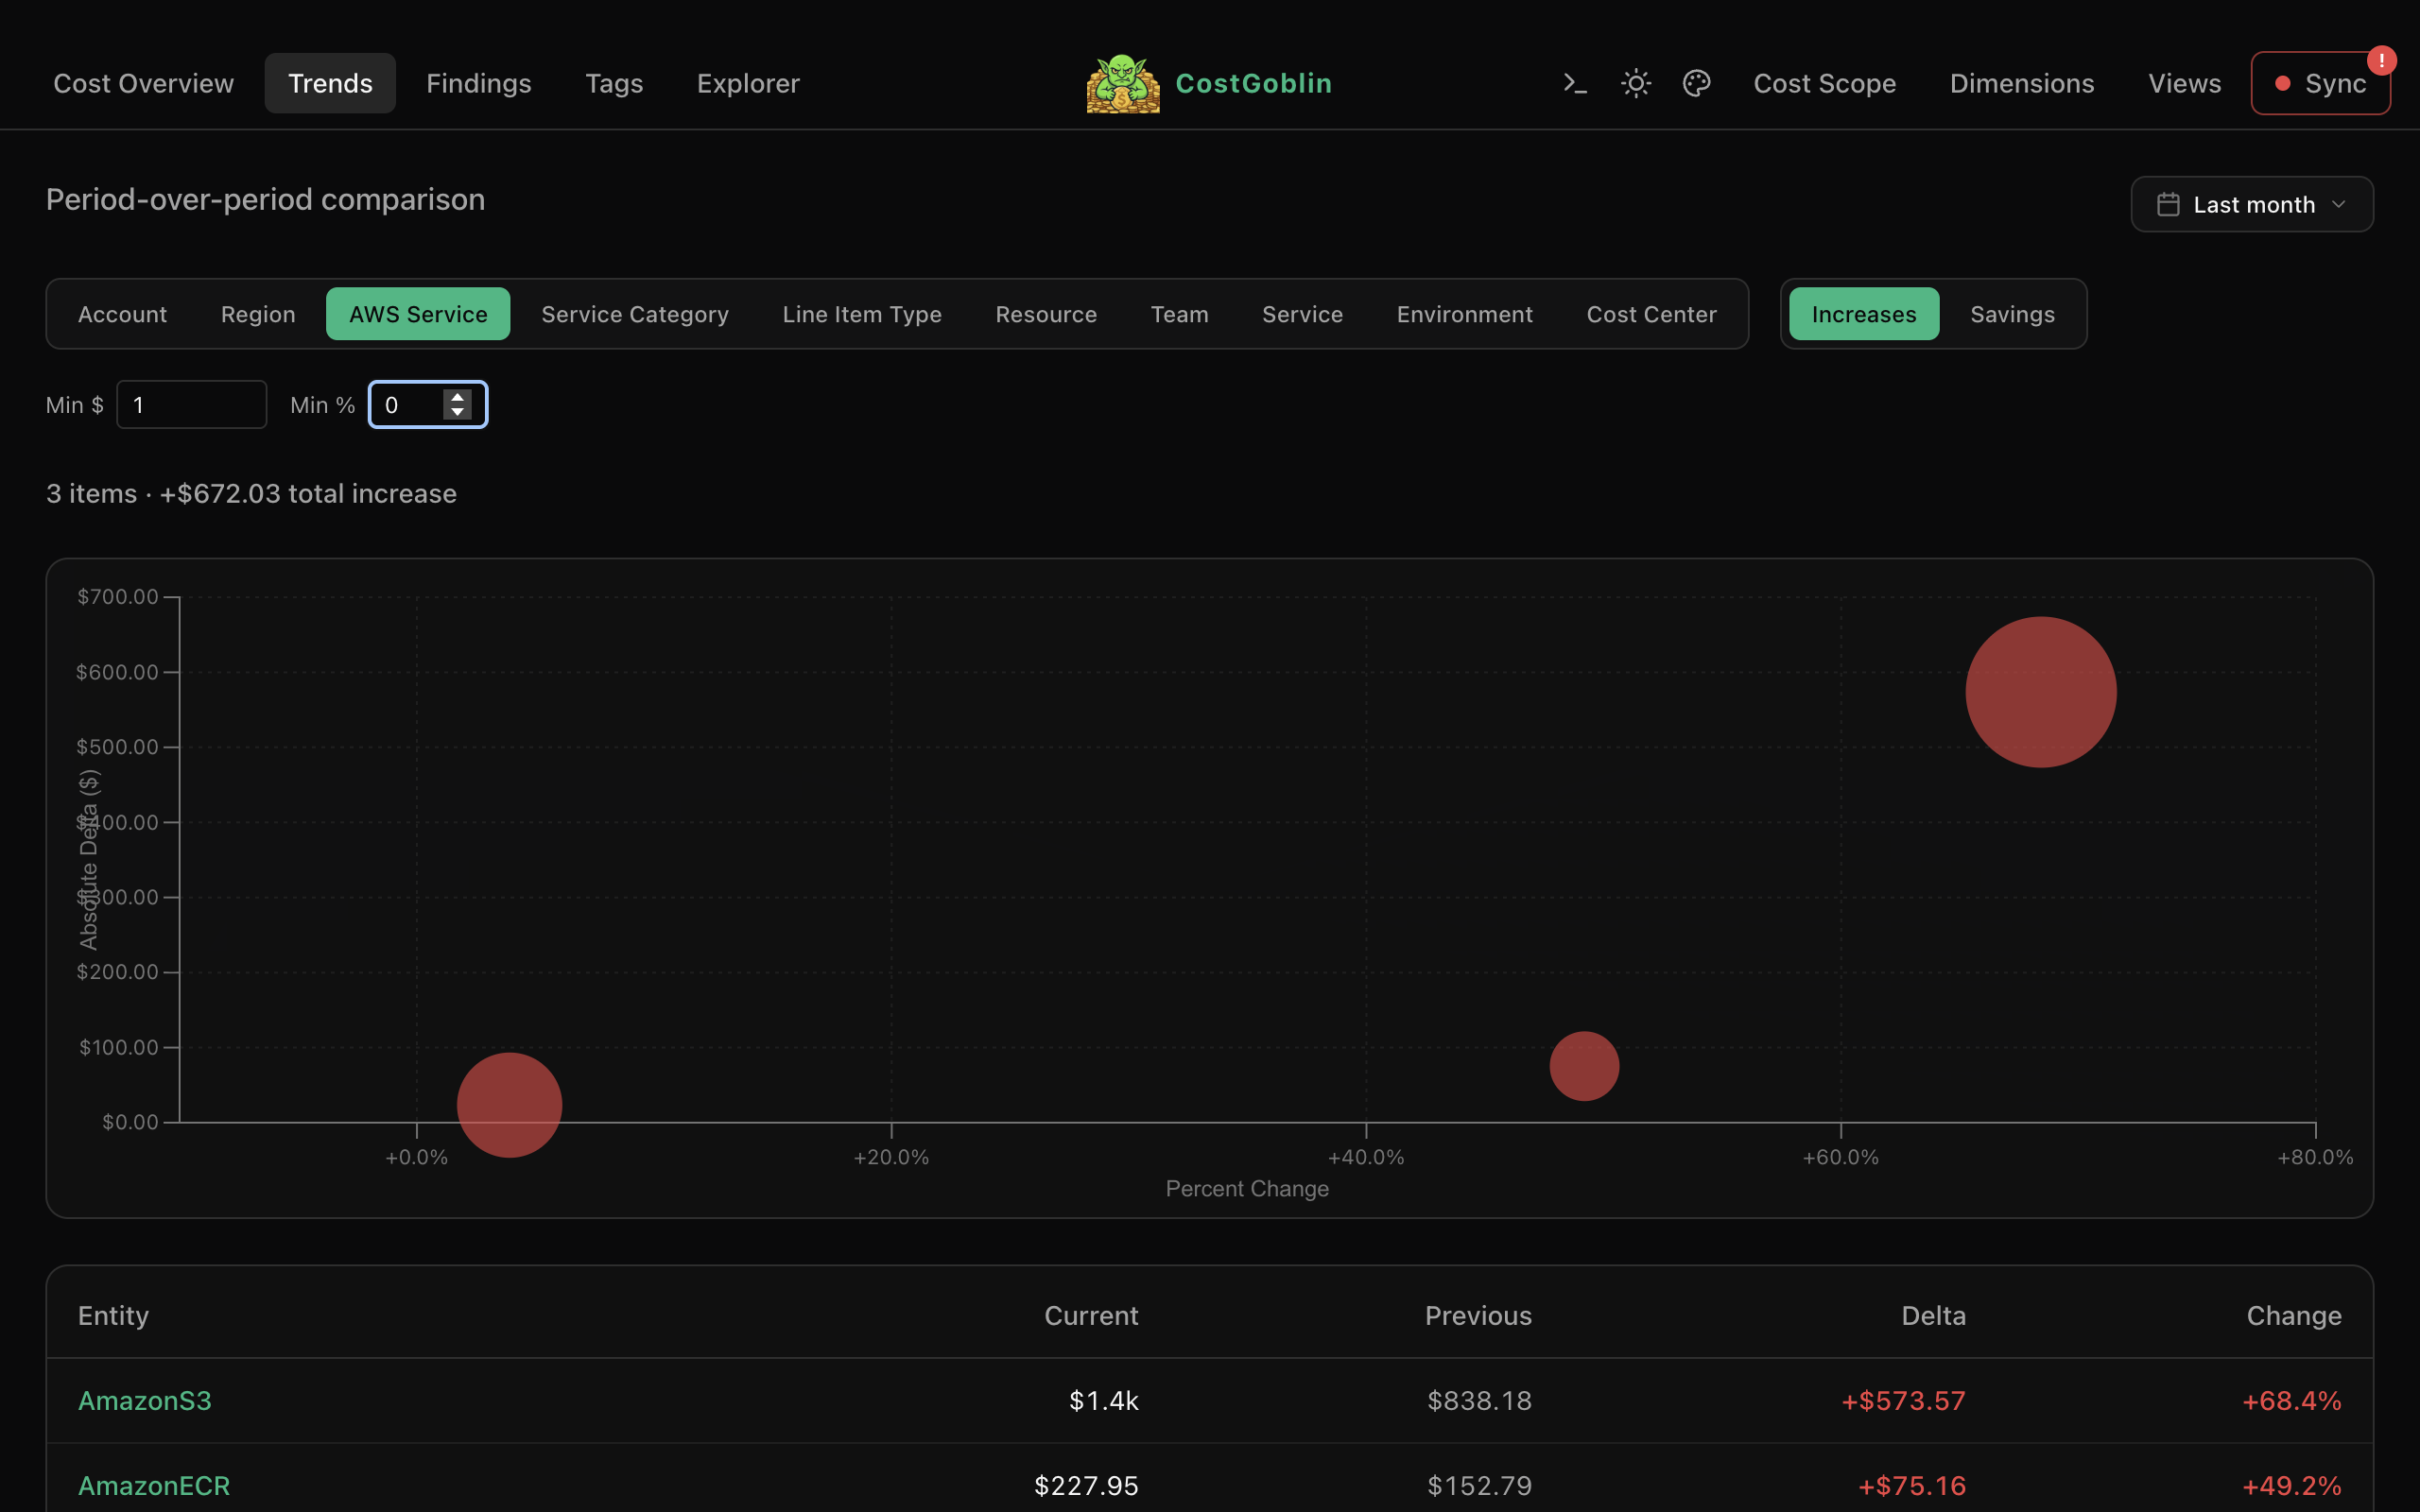
Period-over-period bubble chart shows cost increases and savings at a glance. Bubble size maps to current spend. Filter by minimum dollar or percent change, drill into any entity.
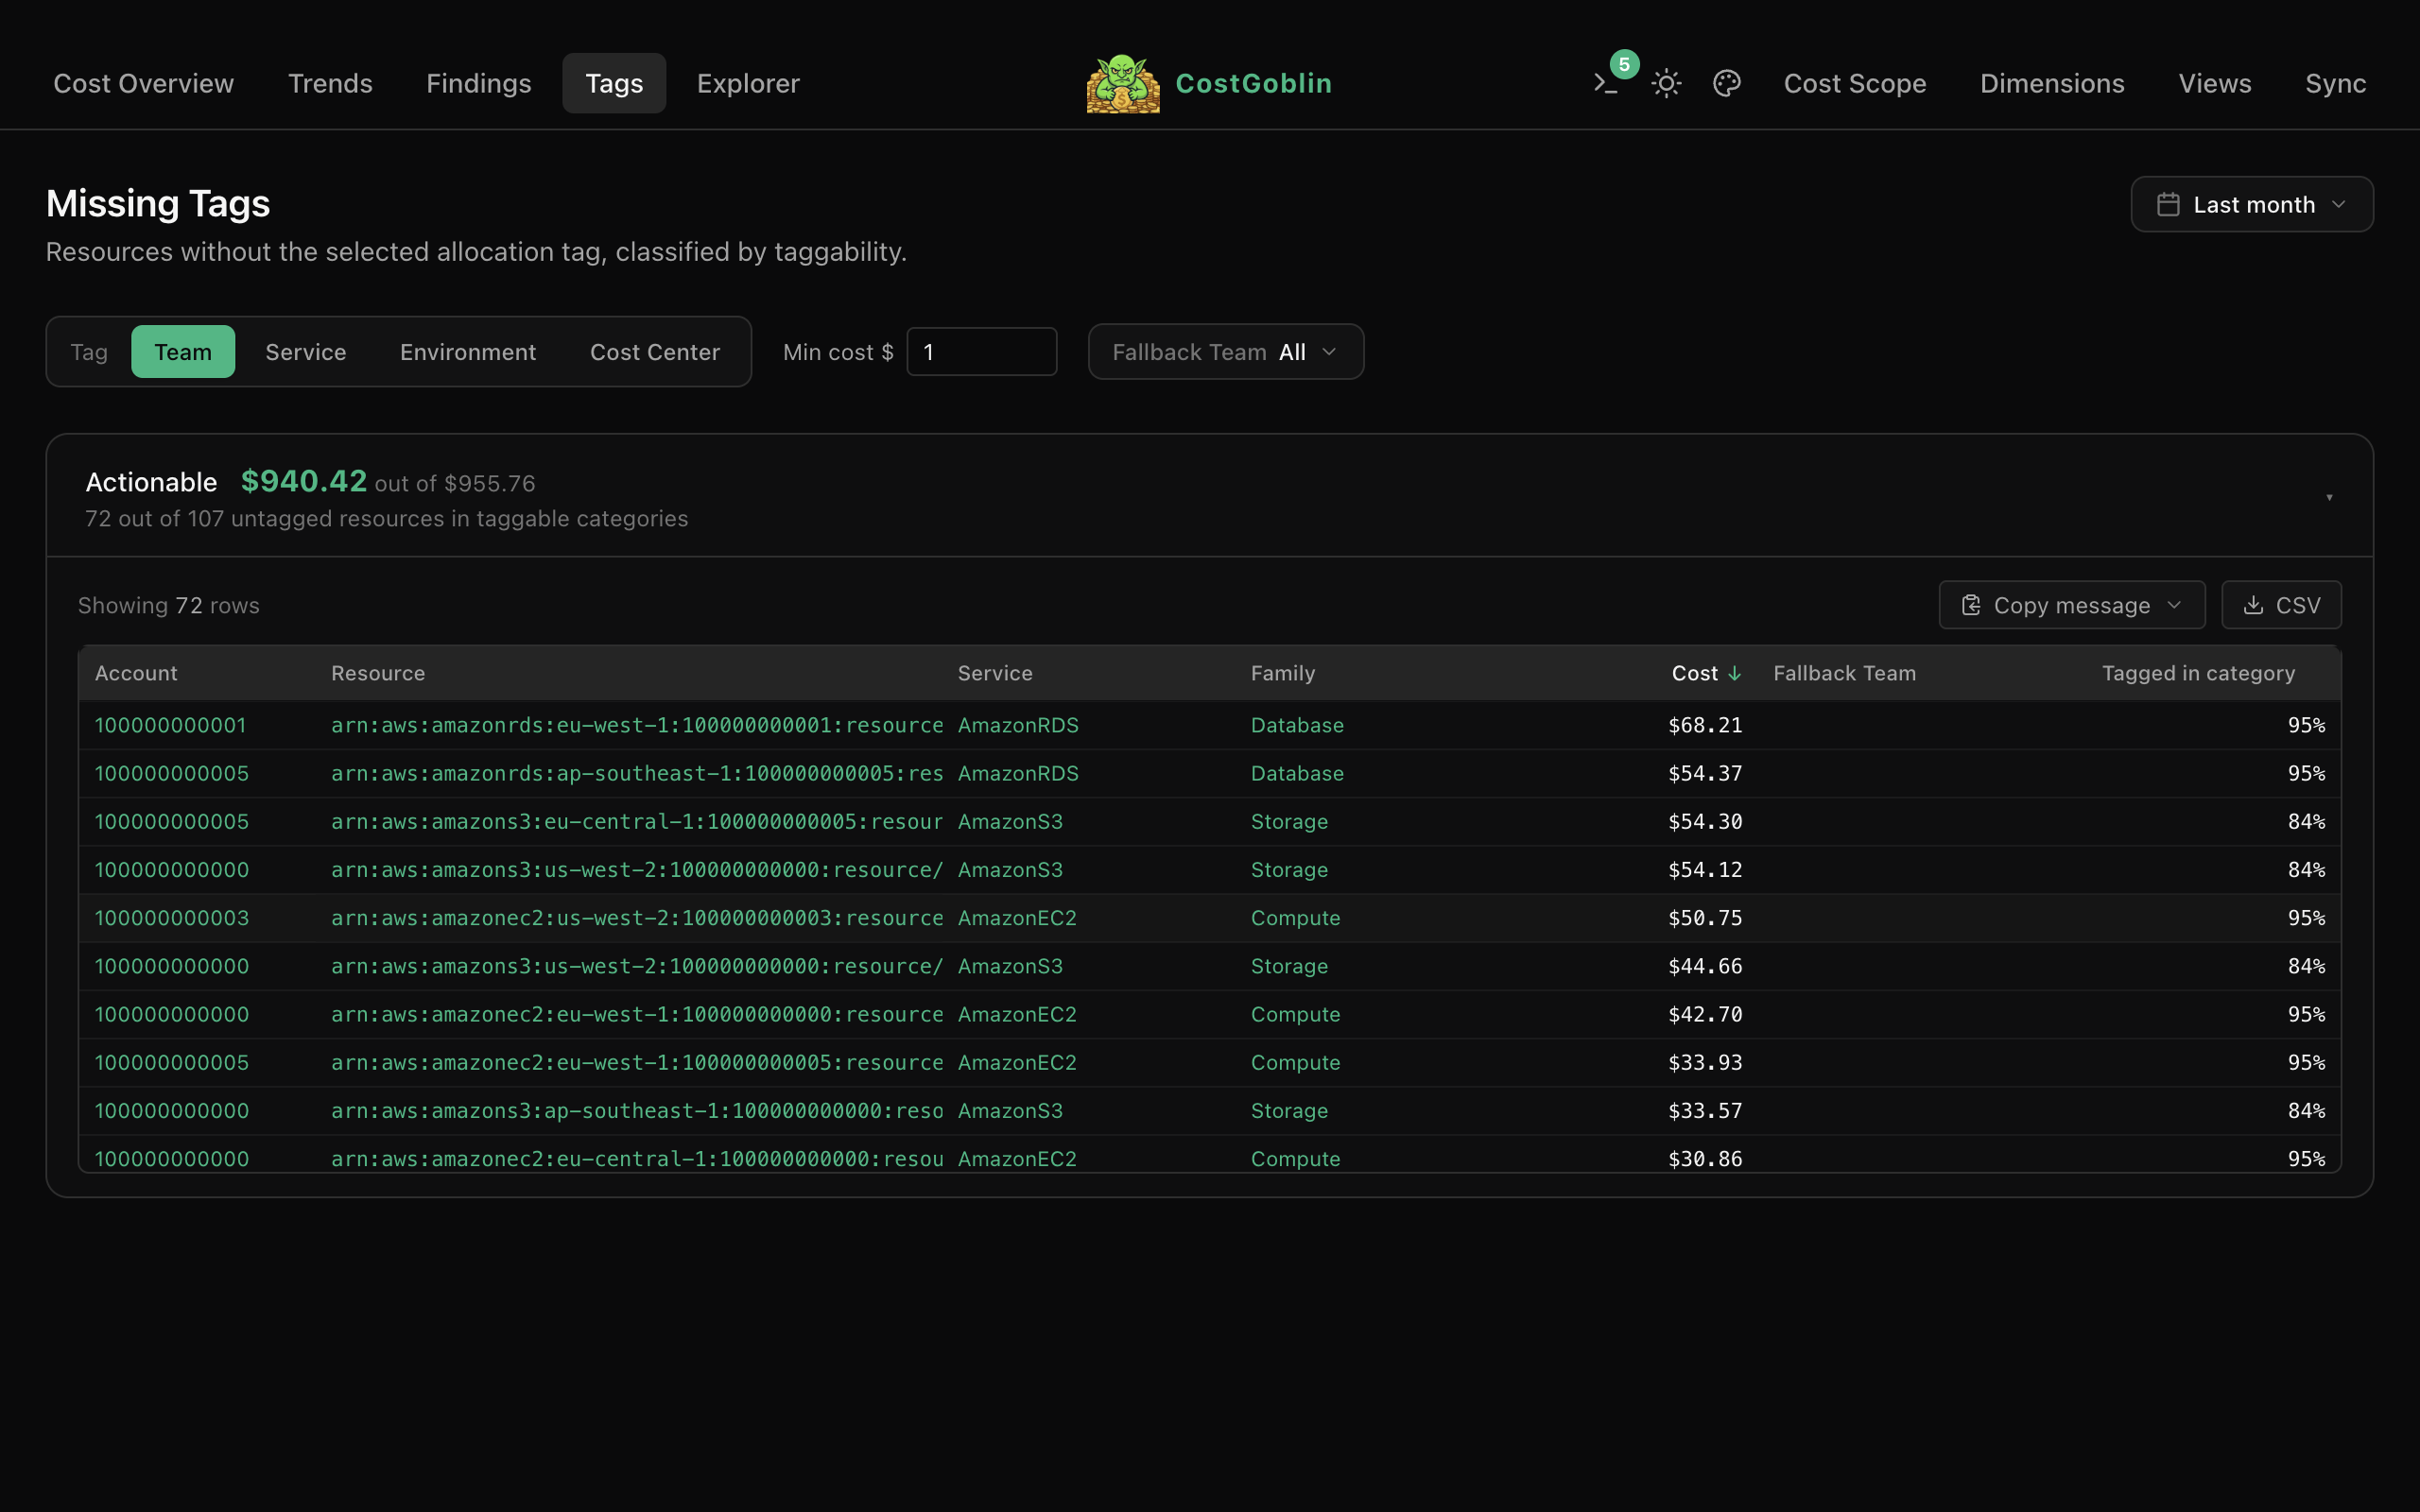
See which resources are missing allocation tags, grouped by actionable vs. untaggable. Filter by dimension, minimum cost, or fallback owner. Copy findings to Slack or Jira in one click.
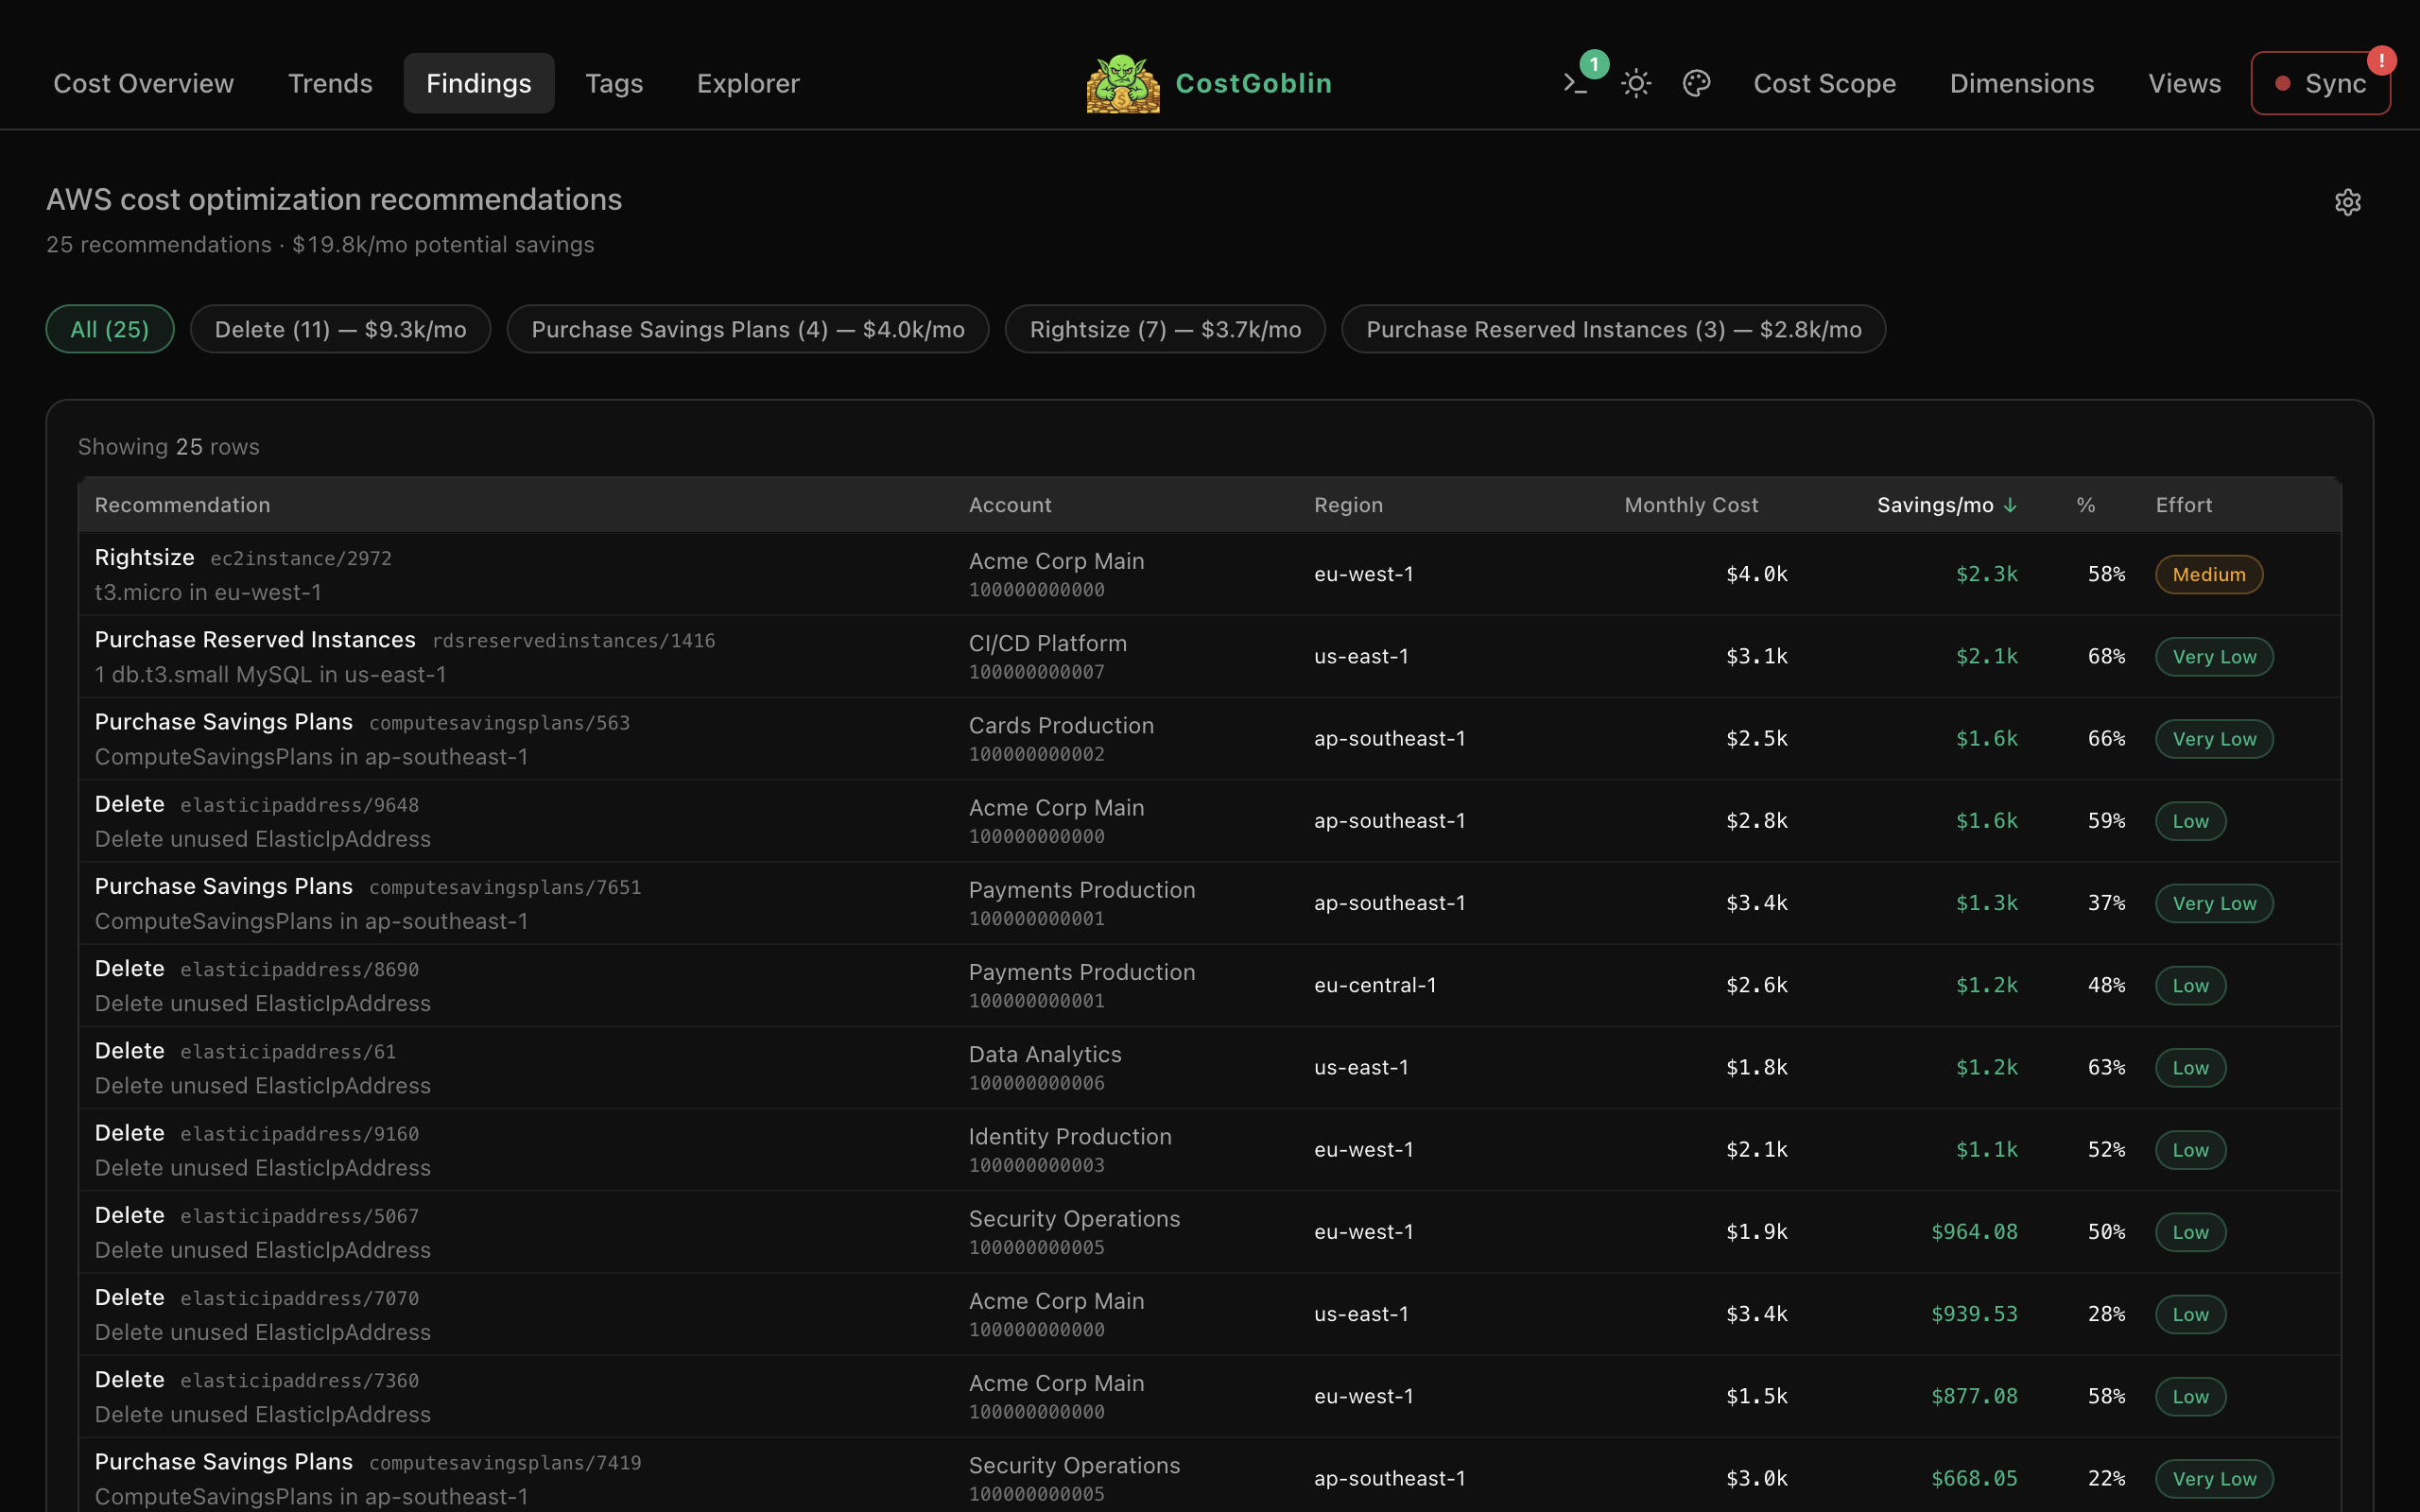
AWS optimization recommendations sorted by monthly savings. See effort level, expand for full resource details, and filter by action type — rightsizing, reserved instances, deletions.
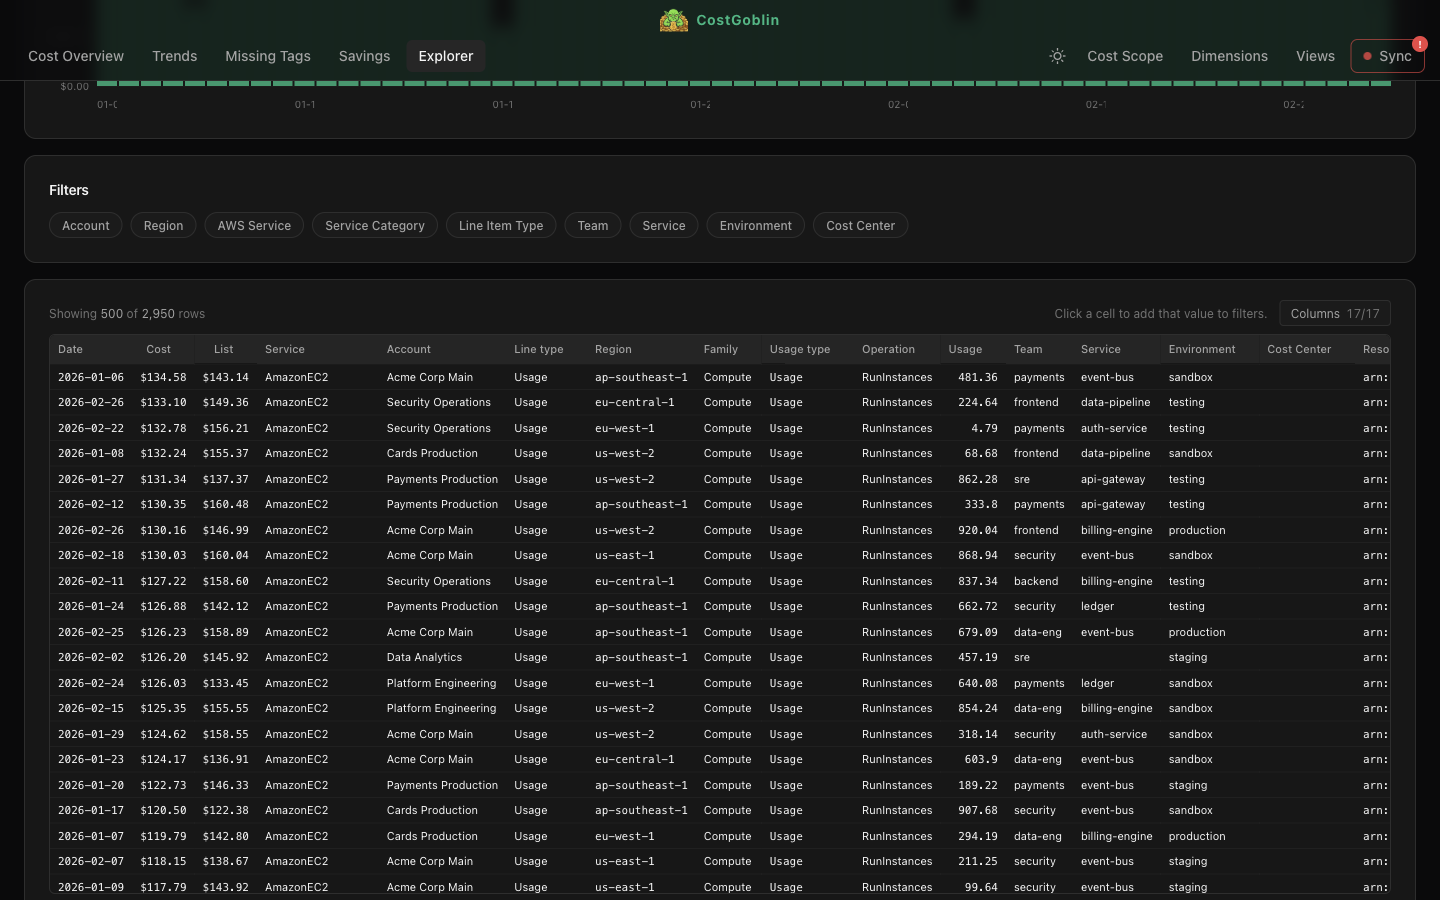
Filter, sort, and explore the raw FOCUS dataset. See daily totals at a glance, slice by any dimension, and click any cell to drill deeper. Thousands of line items queried in milliseconds.
CostGoblin reads FOCUS 1.2 exports straight from your own cloud storage. Nothing leaves your machine, and no third party ever sees your bill. Pick your cloud for the setup guide.
GCP billing lands alongside AWS in v0.7 — FOCUS 1.2 from BigQuery via Cloud Storage. Azure next. One interface for all your cloud spend.
Automatic alerts when spending deviates from historical patterns. Catch surprises before the bill lands.
Set spending targets per team, product, or environment. Track burn rate against budget in real time.
Share dashboards and cost reports with your team. Collaborative triage for cost spikes.
New features, releases, and cloud cost insights. Low volume, high signal.
CostGoblin is built in the open. These companies back the project through their open-source programs, so it stays free for everyone.
Do these first, in the account that owns the billing data (usually the management account), whichever way you then create the exports:
One stack creates everything with the settings CostGoblin needs: the S3 bucket and its lifecycle rules, the daily FOCUS 1.2 export (plus, optionally, the hourly and Cost Optimization Hub exports), and a read-only policy for CostGoblin. The setup wizard opens it for you with your answers filled in: on the bucket step, choose Create one with CloudFormation. Without the app:
Pick a dedicated bucket (or prefix) for all CostGoblin data. We recommend this structure so each export lands in its own namespace:
The export never deletes anything, so add an S3 lifecycle rule per prefix (Management → Create lifecycle rule, scoped with a prefix filter) to stop the bucket growing forever:
From Billing and Cost Management, open Data Exports in the left navigation, then click Create export. Choose Standard data export and select FOCUS 1.2 as the data table (FOCUS_1_2_AWS). Only the daily export is required. You can optionally create a second, hourly export — helpful to understand how costs distribute within a day (intraday drill-down and incident analysis). Configure each as follows:
Under Column selection, keep all columns enabled. These are the ones CostGoblin requires:
Optional, once Cost Optimization Hub is enabled (step 1). In Data Exports, click Create export once more and pick the Cost optimization recommendations table:
Either way, open CostGoblin: the setup wizard points each data source at its S3 prefix. Once the first sync completes, head to Dimensions to map your tags to cost allocation dimensions. This is where CostGoblin shines — for each dimension you can:
In the Console: Billing → Billing export → BigQuery export → enable FOCUS usage cost (not the older FOCUS view, which is FOCUS 1.0). Prefer a Multi-region (EU or US) dataset.
Same location as the export dataset (BigQuery → your billing dataset → Details → Data location):
A small daily job in your project copies changed billing periods from BigQuery into the bucket. Open in Cloud Shell, set the values at the top of deploy.sh, and run it — or locally:
It writes gs://your-company-billing/focus/daily/billing_period=YYYY-MM/. Prefer to see every command? The exporter README has the copy-paste version.
For an organisation (recommended): a read-only service account that can read only this bucket. An admin runs this once; your everyday account then only needs to impersonate it:
For a personal project: just sign in as yourself. Either way, also run:
In Sync, add a Google Cloud provider: enter the project, pick the bucket and the focus/daily/ folder. The wizard reads as costgoblin-reader by default (Change to use another account, or read as yourself) and checks the downloads can read the export before saving.